ESP32 UART
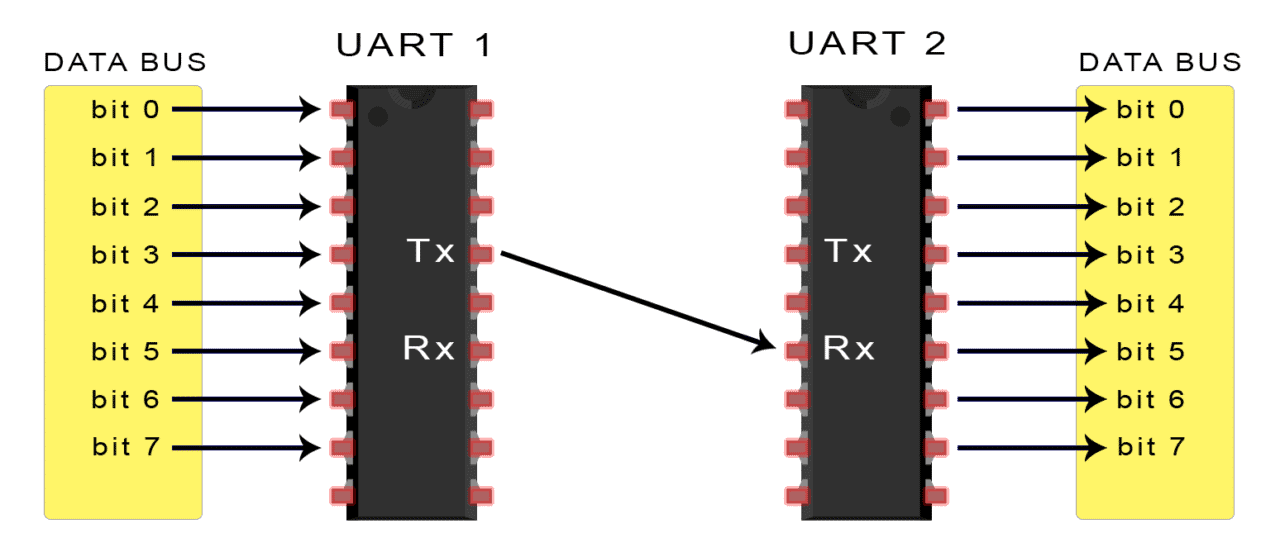
Introduction to UART
UART(Universal Asynchronous Receiver/Transmitter)序列埠
DB9 Connector
 |
 |
Protocol 通訊協定
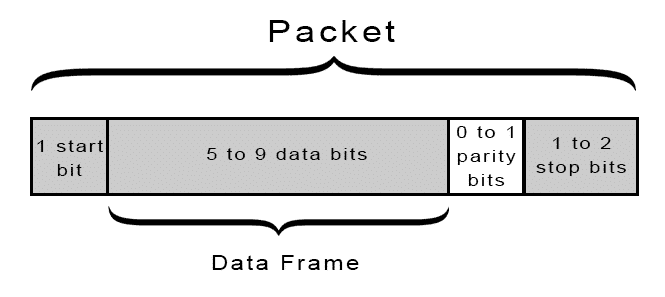
- Standard Packet : 8 data bits, even parity, 1 stop bit
- If the parity bit is a 0 (even parity), the 1 bits in the data frame should total to an even number.
- If the parity bit is a 1 (odd parity), the 1 bits in the data frame should total to an odd number.
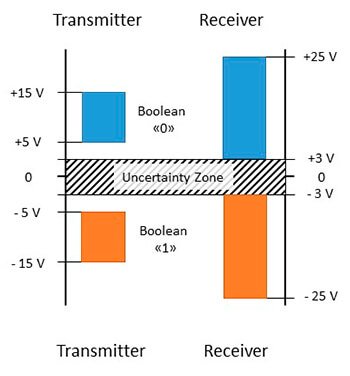
 RS232 的Vpp電壓較高,有 6V~30V;UART 則是較低的 3.3V 或 5V
RS232 為負邏輯, UART 為正邏輯,因此兩者波形是反相的
Baud Rate

The main differences between RS-232, RS-422 and RS-485

NodeMCU-32S pinout

Arduino Serial
- if(Serial): Indicates if the specified Serial port is ready.
- available(): Get the number of bytes (characters) available for reading from the serial port.
- availableForWrite()
- begin()
- end()
- find()
- findUntil()
- flush():Waits for the transmission of outgoing serial data to complete.
- parseFloat(): Serial.parseFloat() returns the first valid floating point number from the Serial buffer.
- parseInt(): Looks for the next valid integer in the incoming serial.
- peek(): Returns the next byte (character) of incoming serial data without removing it from the internal serial buffer.
- print()
- println()
- read()
- readBytes()
- readBytesUntil()
- readString()
- readStringUntil()
- setTimeout(): Serial.setTimeout() sets the maximum milliseconds to wait for serial data. It defaults to 1000 milliseconds.
- write()
- serialEvent(): Called when data is available. Use Serial.read() to capture this data.
[Homework]: UART_read.ino
int incomingByte = 0; // for incoming serial data

void setup() {
  Serial.begin(9600); // opens serial port, sets data rate to 9600 bps
  Serial.println("Serial port begin at baud=9600...");
}

void loop() {
  // reply only when you receive data:
  if (Serial.available() > 0) {
    // read the incoming byte:
    incomingByte = Serial.read();

    // show what you got:
    Serial.print("Received: ");
    Serial.println(incomingByte, HEX);
  }
}
- Create code

- run on NodeMCU-32S & enter “Hello” on serail monitor to verify

[Homework]: Examples>04.Communication>SerialPassThrough
- Verify SerialPassThrough.ino

- Connect TX1 to RX1 * Keyin text on serial-monitor to test it

Arduino SoftwareSerial
- SoftwareSerial()
- available()
- begin()
- isListening()
- overflow()
- peek()
- read()
- print()
- println()
- listen()
- write()
#include <SoftwareSerial.h>

SoftwareSerial mySerial(2, 3); // RX, TX

void setup()
{
  // Open serial communications and wait for port to open:
  Serial.begin(115200);
  while (!Serial) {
    ; // wait for serial port to connect. Needed for Native USB only
  }


  Serial.println("Goodnight moon!");

  // set the data rate for the SoftwareSerial port
  mySerial.begin(38400);
  mySerial.println("Hello, world?");
}

void loop() // run over and over
{
  if (mySerial.available())
    Serial.write(mySerial.read());
  if (Serial.available())
    mySerial.write(Serial.read());
}
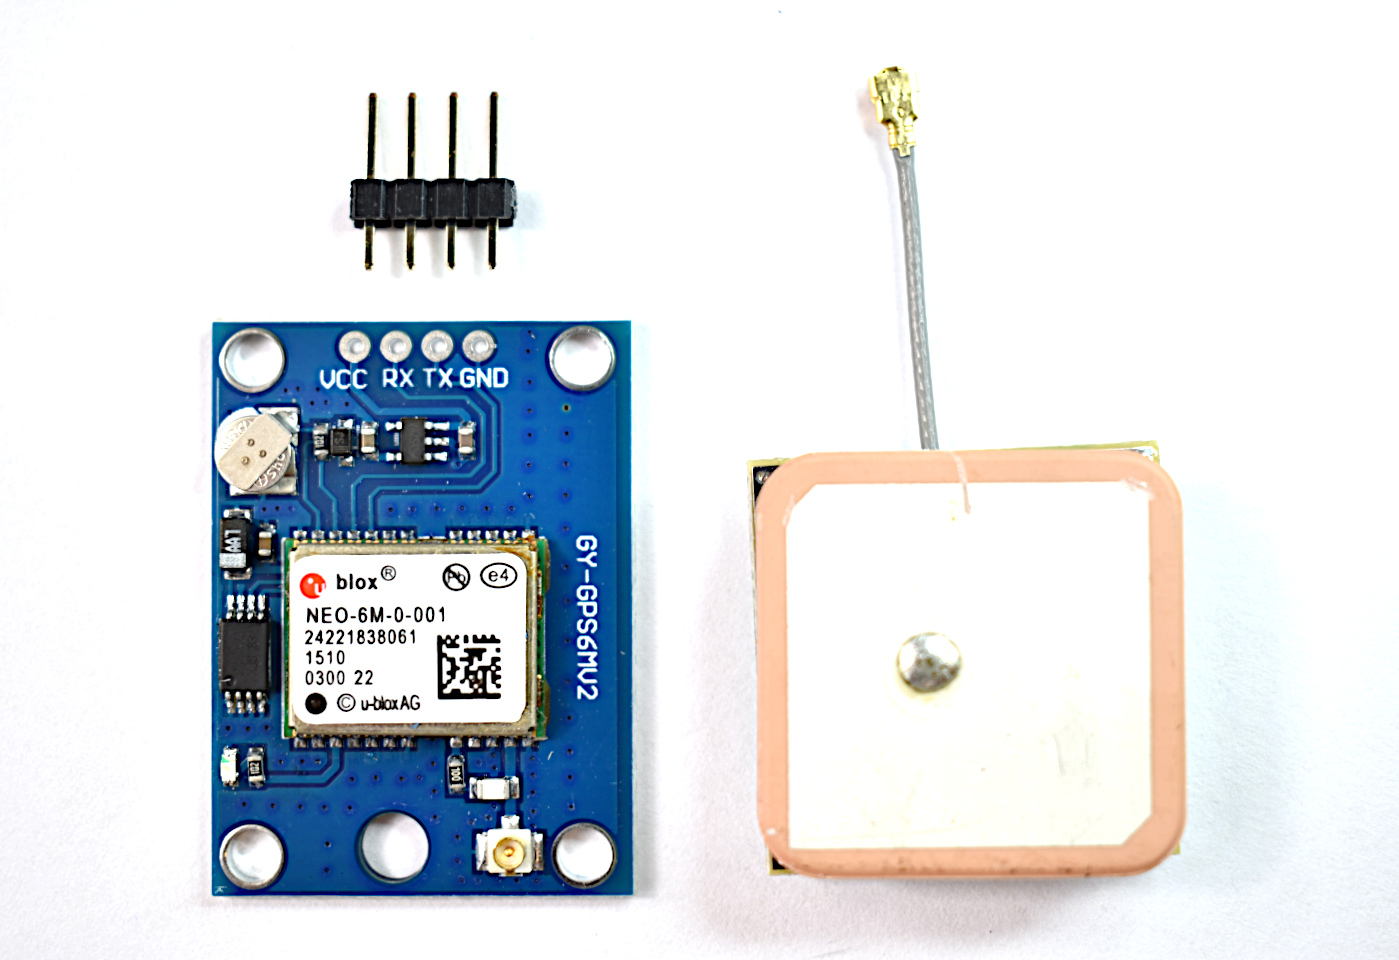
Peripheral/Sensor using UART

This site was last updated June 17, 2025.
